Telegram Notifications from Home Assistant
Home Assistant can communicate with you and others using the Telegram messenger. You can use Telegram to receive alerts and control your smart home from anywhere in the world with an internet connection.
Home Assistant can send notifications via a plethora of messaging services including the popular messenger Telegram, allowing you to receive real time notifications without having direct access to your Home Assistant instance. Additionally, you can also configure the telegram integration to respond to your commands, for example to disarm your alarm or to water your plants while you’re on vacation.
You have to create a Telegram bot account to be able to send and receive messages from Home Assistant. A bot account can be created with a few simple steps by messaging the BotFather Bot:
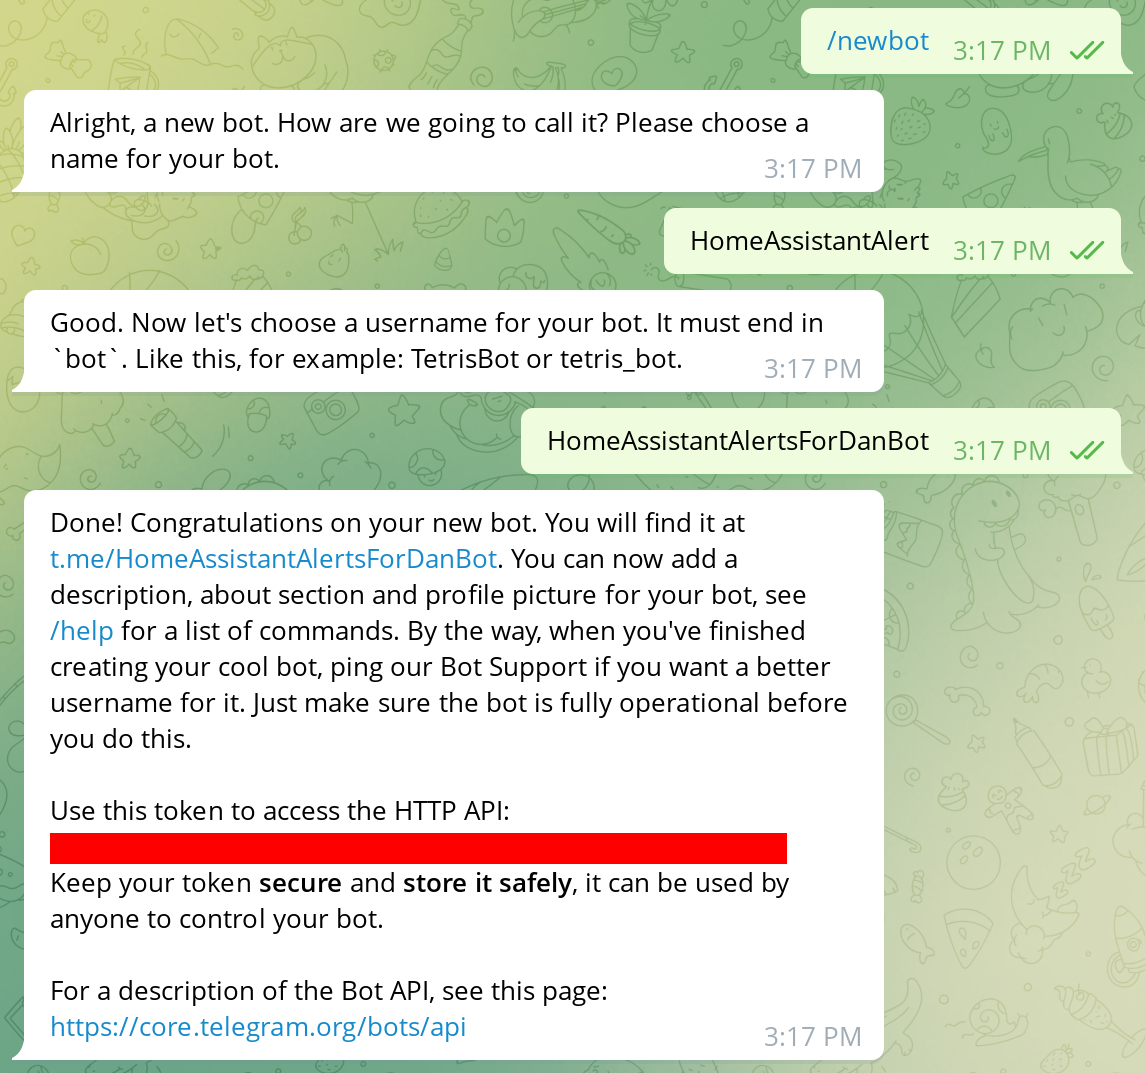
Start by entering the command /newbot. Then you will be prompted for the name
of the bot, where you can pick anything that you want. After that, you have to
pick a unique username of this bot. The only limitation is that it must end with
bot and no bot account with this name must exist. In case your desired
username is already taken, try a new one (you do not have to restart the whole
process).
Once your bot has been successfully created, you will get a message from the BotFather with a token (it would appear in place of the red rectangle in the above image). Save this token and keep it secure as it can be used to impersonate your bot!
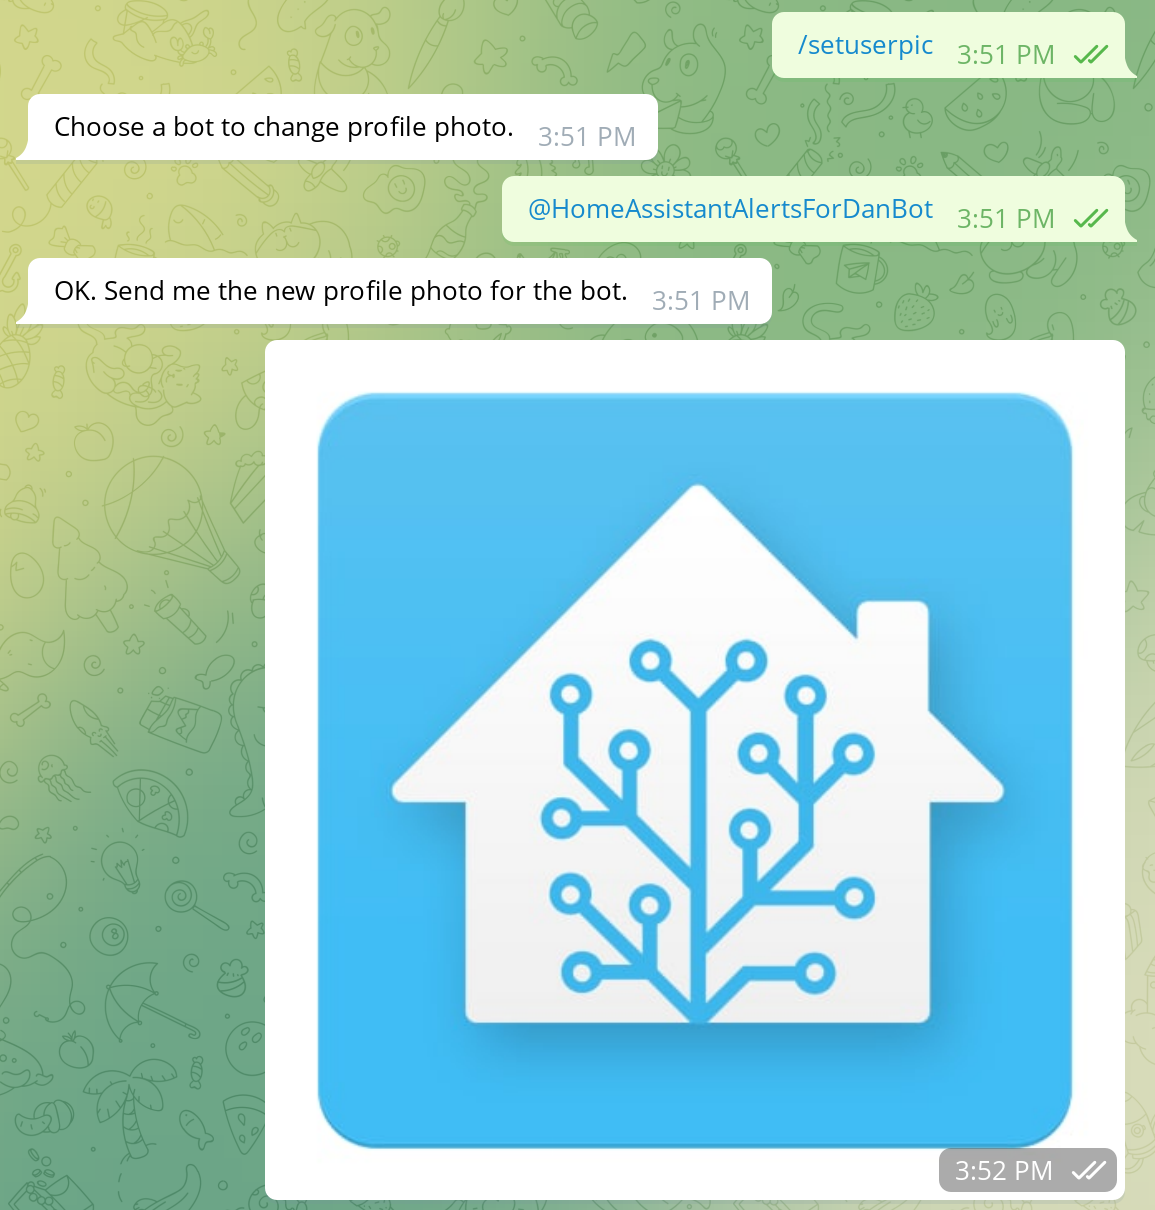
You can now customize your bot further if you like to, e.g. set its description
via /setdescription or change the bot’s profile picture via /setuserpic as
shown in the image below:
Home Assistant will only communicate with the users or groups that you allow it to and will ignore everyone else. This ensures that only users that you specify can receive alerts or issue commands via the bot. Users and groups are identified via a Chat ID, which can be obtained as follows.
If you want the bot to only communicate with your account, then you can use the
GetIDs Bot for that. Message the GetIDs
Bot, type /start and grab the Chat ID from its reply:
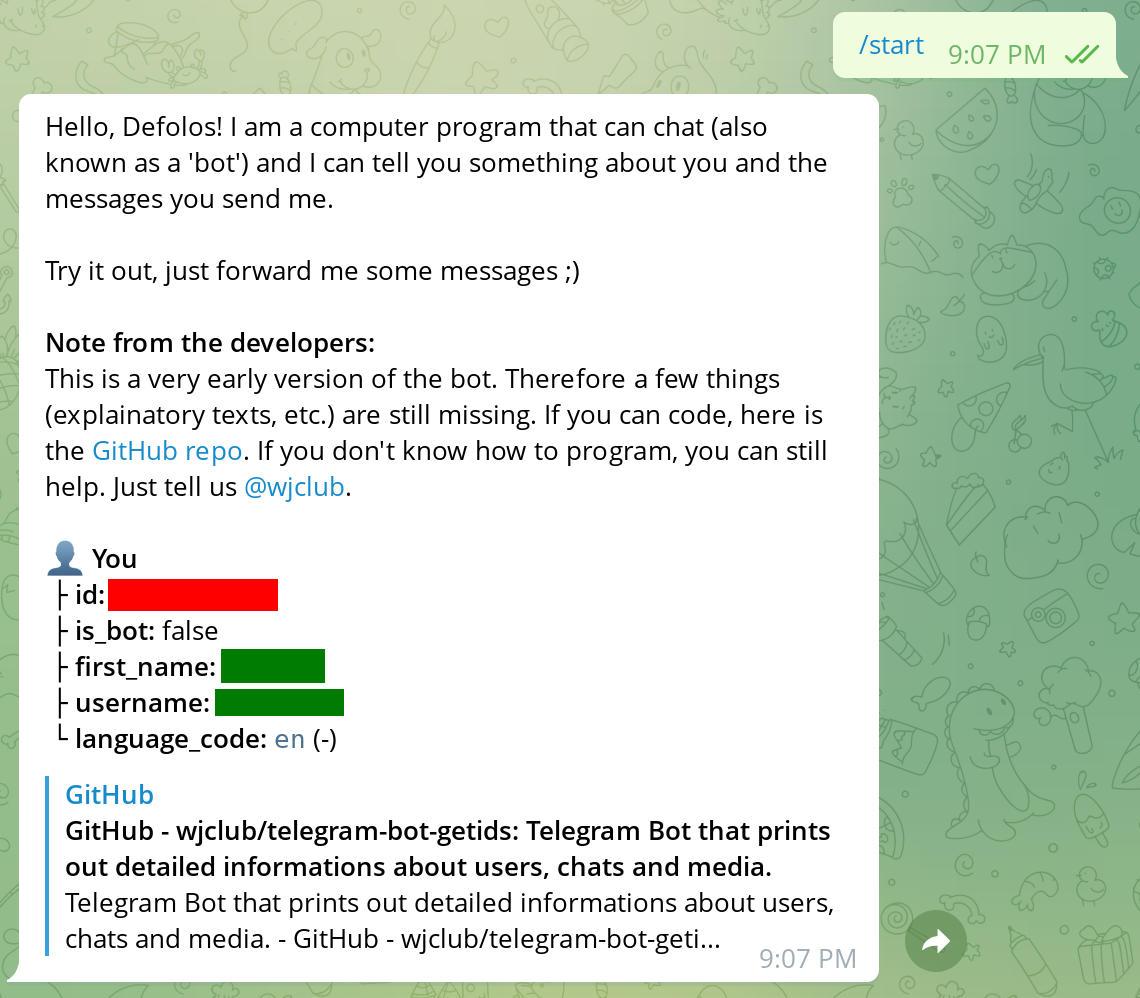
Obtaining the Chat IDs of additional users can also be performed via the GetIDs bot. Ask the user to message the GetIDs Bot bot and send you the Chat ID.
You can also use the Telegram API itself to retrieve the Chat IDs. Going via the
API is necessary when adding your bot to groups and it allows you to obtain the
Chat IDs of all recent conversations. To obtain a group’s or a user’s Chat ID,
add your bot to the respective group or ask the user to chat with the bot
account. In both cases, you must activate the bot in each conversation
(i.e. every user and every group have to perform this action) by sending it a
/start message in the chat. Once this has happened, send a GET request to
https://api.telegram.org/bot<YOUR_API_TOKEN>/getUpdates, e.g. via curl and
jq:
❯ curl -X GET https://api.telegram.org/bot$API_TOKEN/getUpdates|jq
  % Total    % Received % Xferd  Average Speed   Time    Time     Time  Current
                                 Dload  Upload   Total   Spent    Left  Speed
100  2088  100  2088    0     0  14887      0 --:--:-- --:--:-- --:--:-- 14914
{
  "ok": true,
  "result": [
    {
      "update_id": 121143347,
      "message": {
        "message_id": 3,
        "from": {
          "id": USER_CHAT_ID,
          "is_bot": false,
          "first_name": "USER_FIRST_NAME",
          "username": "USERNAME",
          "language_code": "en"
        },
        "chat": {
          "id": USER_CHAT_ID,
          "first_name": "USER_FIRST_NAME",
          "username": "USERNAME",
          "type": "private"
        },
        "date": 1661350108,
        "text": "test"
      }
    },
    {
      "update_id": 121143348,
      "message": {
        "message_id": 4,
        "from": {
          "id": SOME_USER_CHAT_ID,
          "is_bot": false,
          "first_name": "SOME_USER_FIRST_NAME",
          "username": "SOME_USER_NAME",
          "language_code": "en"
        },
        "chat": {
          "id": GROUP_CHAT_ID,
          "title": "GROUP_TITLE",
          "type": "group",
          "all_members_are_administrators": true
        },
        "date": 1661350208,
        "text": "/start",
        "entities": [
          {
            "offset": 0,
            "length": 6,
            "type": "bot_command"
          }
        ]
      }
    },
  ]
}
The Chat ID are in the message.chat.id field of the result array. You can
obtain the Chat IDs only with a jq filter:
❯ curl -X GET https://api.telegram.org/bot$API_TOKEN/getUpdates | \
       jq '.["result"] | .[].message.chat.id'|sort|uniq
  % Total    % Received % Xferd  Average Speed   Time    Time     Time  Current
                                 Dload  Upload   Total   Spent    Left  Speed
100  2088  100  2088    0     0  13210      0 --:--:-- --:--:-- --:--:-- 13215
CHAT_ID_1
CHAT_ID_2
CHAT_ID_3
GROUP_ID_1
null
Note that Chat IDs with users are always positive and Group IDs are always
negative. There is no need to worry in case the above command lists a null
entry, this just means that there was an event not belonging to a specific chat
(e.g. when the bot is removed from a conversation).
The telegram integration cannot be added by the web interface, you have to add
the following snippet into configuration.yaml in Home Assistant’s
configuration directory:
telegram_bot:
  - platform: polling
    api_key: $BOT_TOKEN

    allowed_chat_ids:
      - $CHAT_ID1
      - $CHAT_ID2
Replace $BOT_TOKEN with the token that you got from the BotFather and insert
the Chat IDs of all chats that the bot shall communicate with.
Sending alerts or simple messages can be achieved using the telegram
notification platform or
by using the
telegram_bot.send_message
service. The advantage of the notification platform is that you can define chats
and give them a name for easier usage in automations.
To setup the telegram notification platform, add the following lines to
configuration.yaml:
notify:
  - platform: telegram
    name: telegram_direct_message_to_user_1
    chat_id: $CHAT_ID_1
  - platform: telegram
    name: telegram_direct_message_to_user_2
    chat_id: $CHAT_ID_2
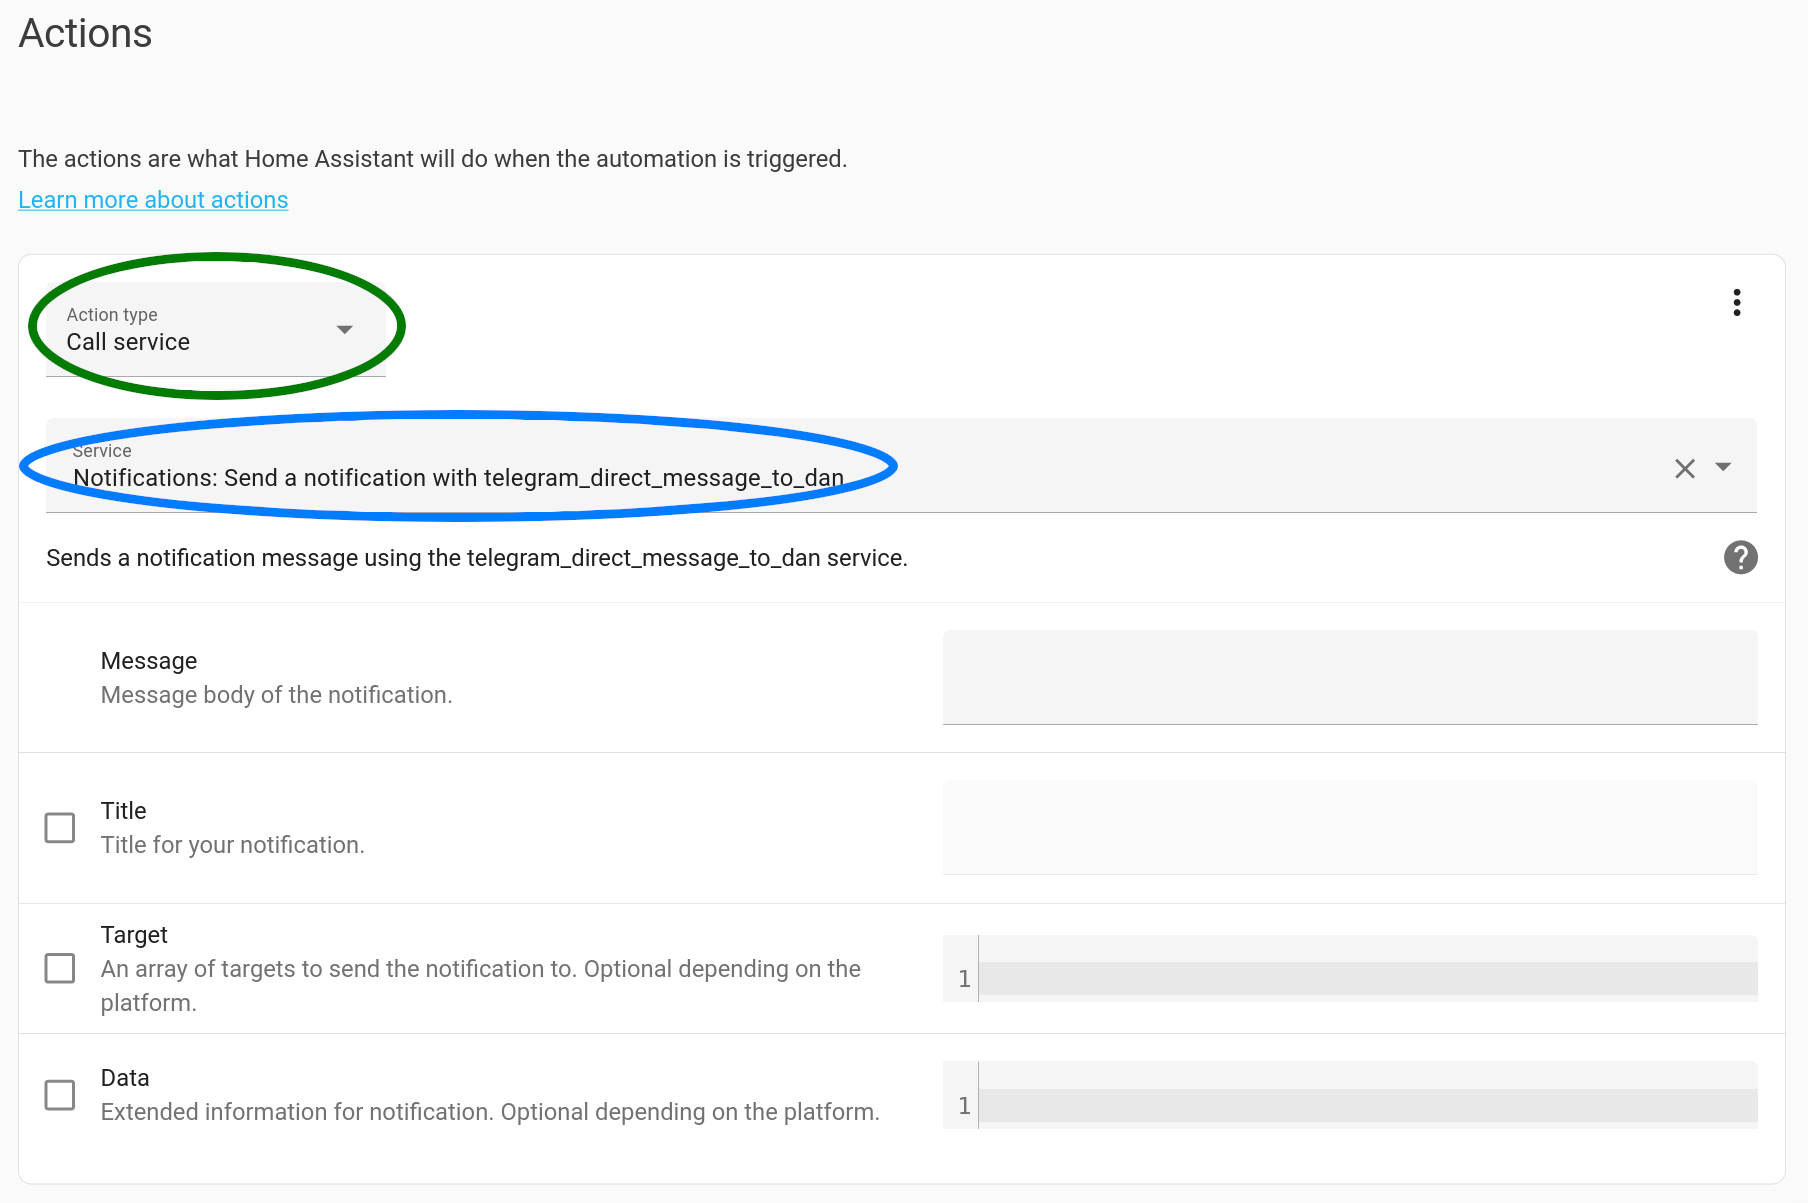
You can then use the notification service directly as an action in an
automation. When creating automations via the web interface, scroll down to the
“Actions” part, select Call Service as the Action type and enter the name
from configuration.yaml into the Service field:
Or when creating an automation via YAML, use the following snippet to send a notification as an action:
service: notify.telegram_direct_message_to_user_1
data:
  message: Telegram message body
  title: Telegram message title
The other option is to use the telegram_bot.send_message service directly. It
allows you to further customize the message that is sent in contrast to the
notification platform. On the other hand, you have to specify the chat id for
every service call (unless you are sending a message to the first specified chat
id from your configuration.yaml).
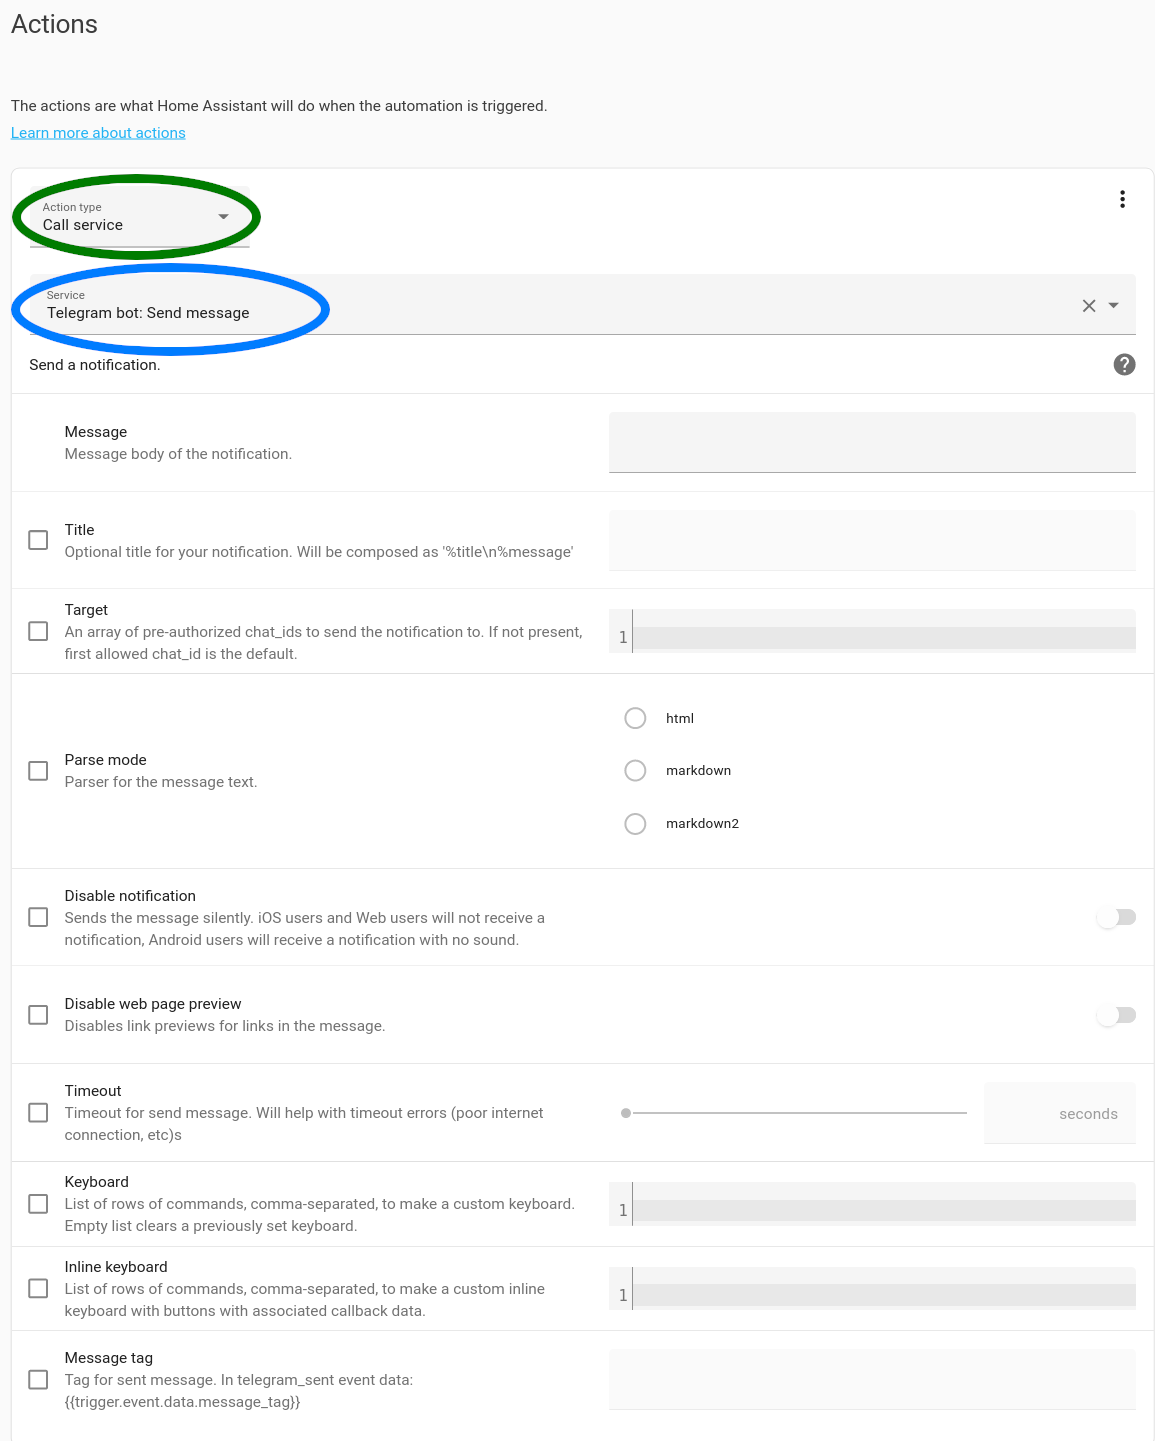
To use the telegram_bot.send_message action in an automation that has been
created via the web interface, select Call Service as the Action type and
enter telegram_bot.send_message into the Service field as shown in the image
below. Customize the message to your desire and optionally specify the Chat ID
to which the message will be delivered.
Or when adding an action in yaml add the following snippet into
automations.yaml:
service: telegram_bot.send_message
data:
  title: "Optional message title"
  message: "Telegram message body"
Documentation of the
telegram_botintegration including examples.Example how to create an interactive automation: https://siytek.com/home-assistant-telegram-bot/#Create-text-automation-example